
WhySynth ControllerPart 2 - Designing the Controller
Choosing a plugin
The appeal of analog synthesizers is hard to deny. Many of the sounds often associated with electronic music come from some combination of analog oscillators and filters. Huge basses, soaring leads and lush pads can easily be conjured from an analog synthesizer. One only needs to take a brief look of the synthesizer market, both hardware and software, to see the popularity of the analog synthesizer (or digital recreations thereof).
With this and the requirements in part 1 in mind, I decided that my first control panel should be for some kind of virtual analog synthesizer. Something that could be your 'bread and butter' synth, capable of creating all the sounds associated with analog synthesis quickly and easily. WhySynth fit this requirement nicely.
Simplifying WhySynth
WhySynth's wide range of oscillator types has analog synthesis well covered. In fact, there's too many oscillator types to fit onto a reasonably sized control panel. So I limited myself to just the most common waveforms found on analog synthesizers.
Although quite comprehensive, there a few features that I've added to the control panel that aren't (at the time of writing) part of WhySynth:
- High pass filters
- Band Reject filter
- Repeating Envelopes
- Bipolar Envelope outputs
- Another (expanded) modulation mixer
I haven't implemented all of these features yet, so feel free to pick them up if you feel like hacking on WhySynth's code. Right now I'm just concentrating on getting the hardware up & running. I'm not entirely sure about the usefulness of the envelope enhancements just yet, so I may remove them in later revisions of the control panel.
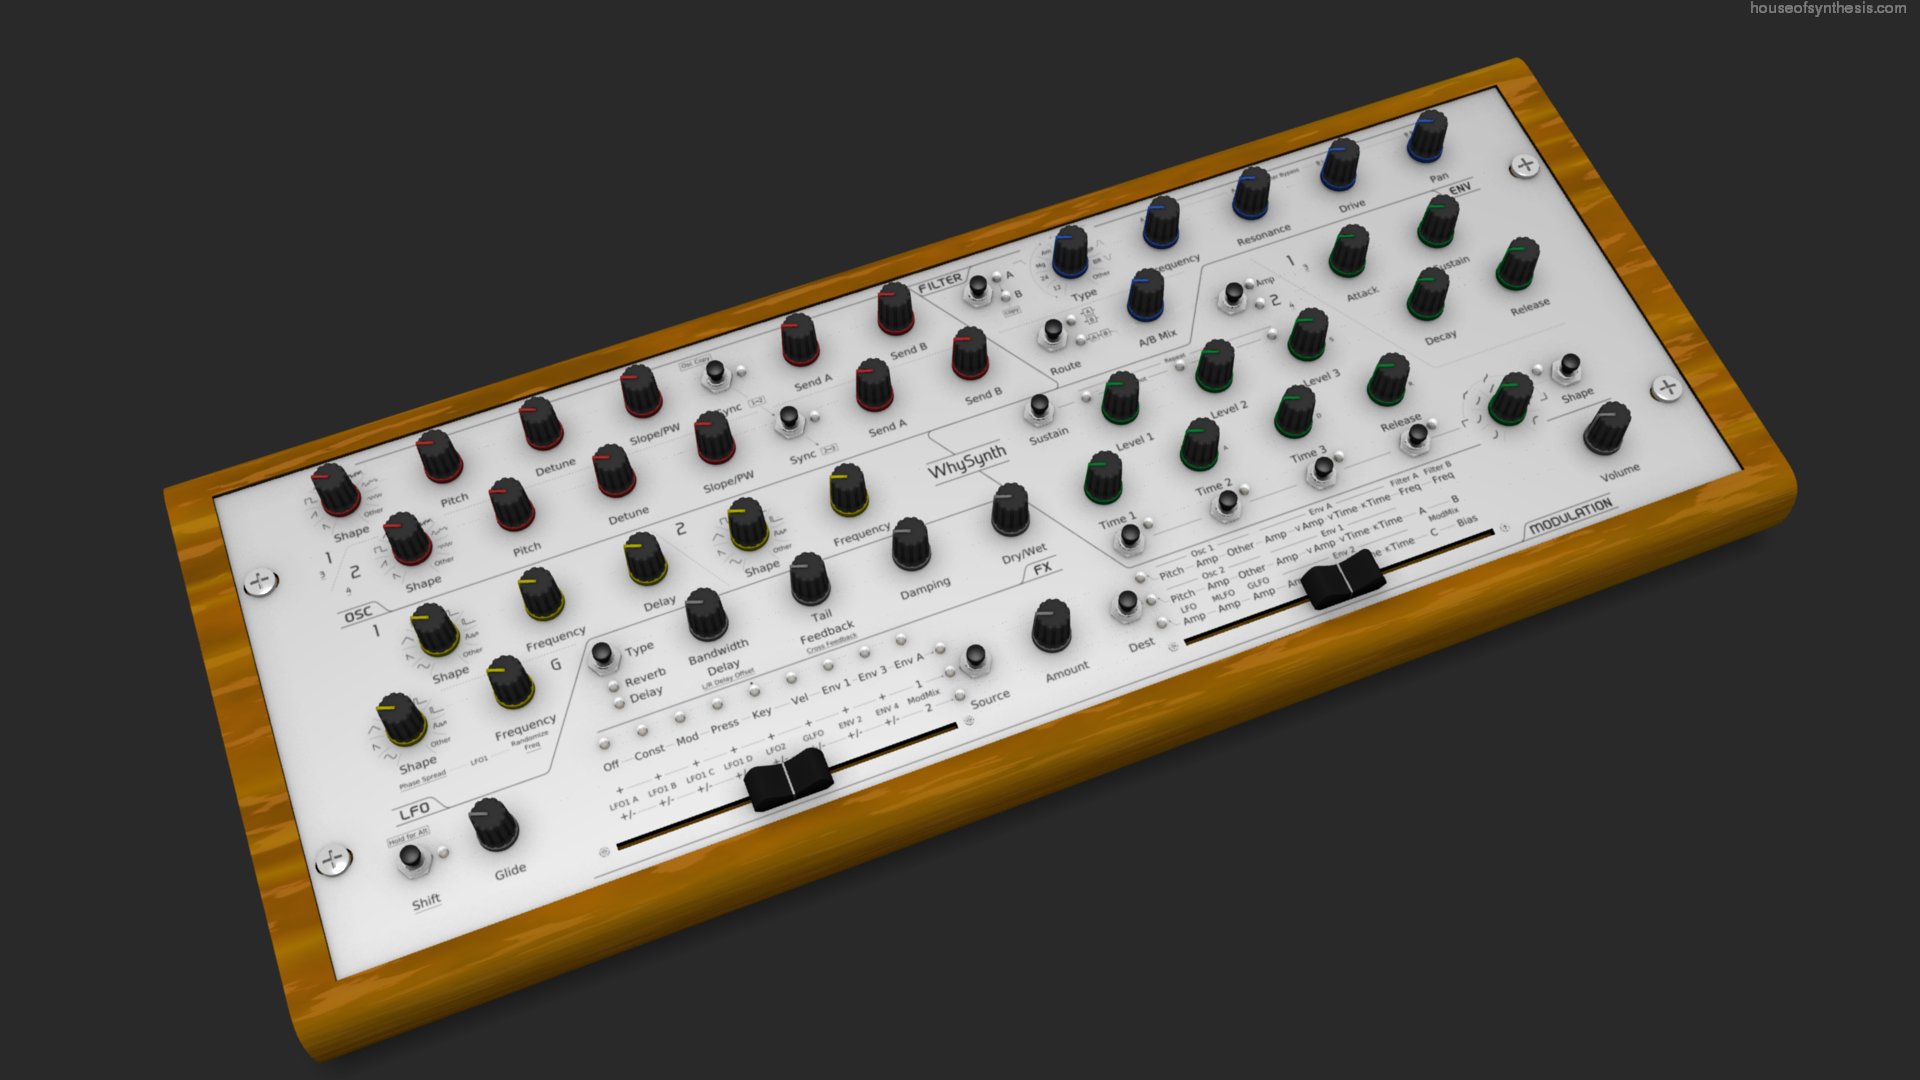
The panel on which the controls are mounted is 19 inches wide, allowing it to be mounted in standard rack equipment. Since the design was entered in the Livid Instruments Design Your Own Controller Contest, I put the panel in a wooden enclosure similar in style to the Ohm64. I'll probably replace this with just wood end pieces, much like Livid Instruments is now doing.
The controls are all panel mount, preventing forces being transferred from heavy button presses onto a PCB. It also simplifies servicing as you don't need to remove all the nuts & knobs for each potentiometer on the PCB just to get to the one you need to replace. That being said, I have yet to come across a good looking (and affordable) panel mount button, and may switch to PCB mounted controls at some stage. A PCB based design would also enable production in higher volumes than hand assembly, should any demand arise.
The Design Process
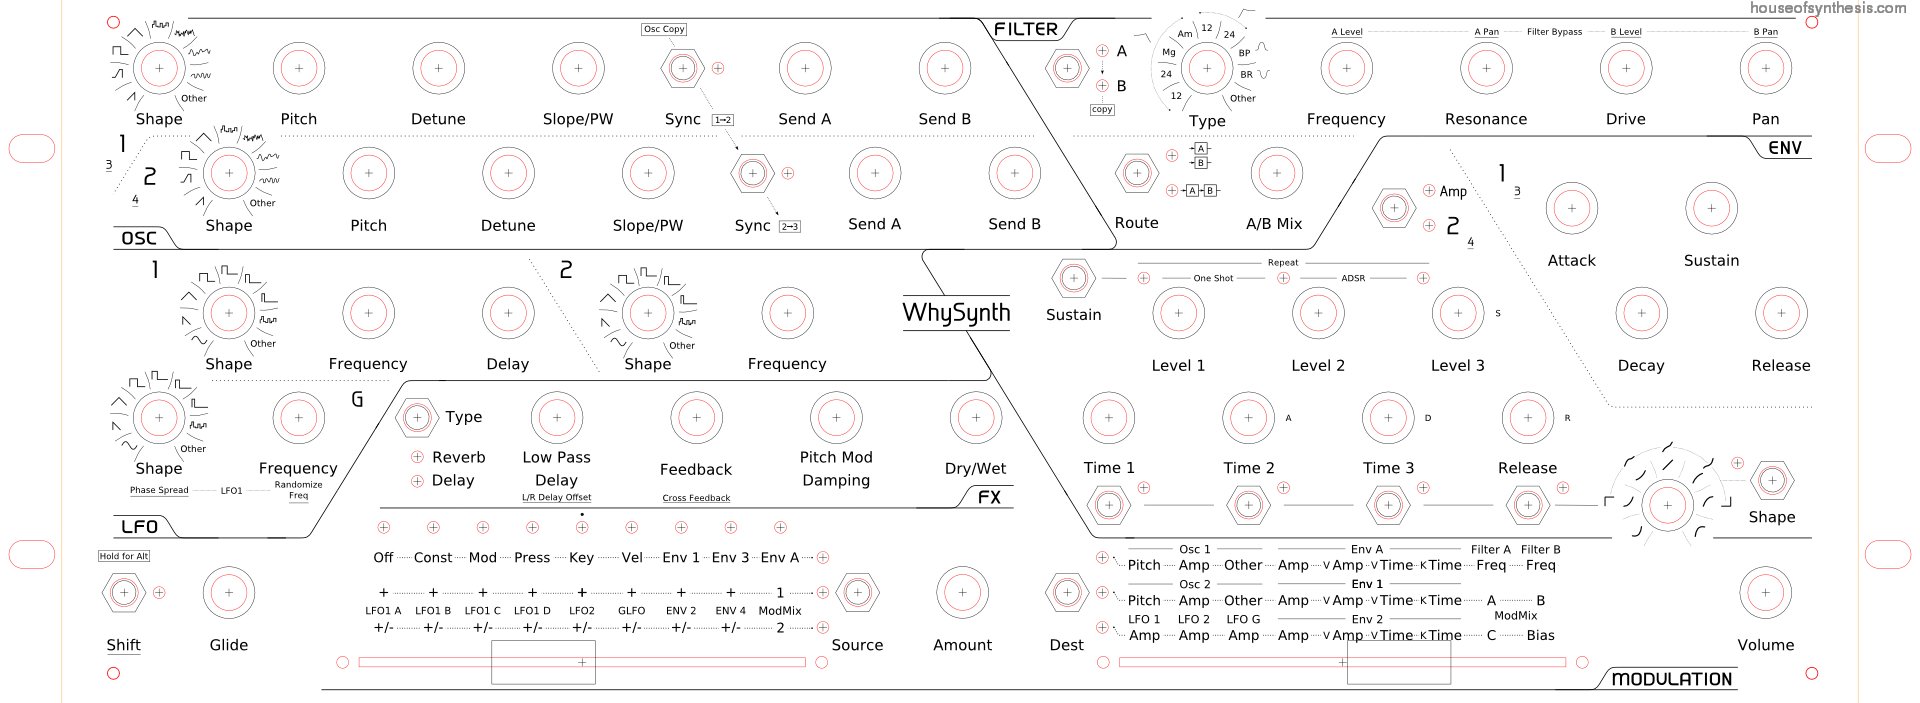
After deciding that I'd concentrate on virtual analog synthesis, I thought about how to simplify WhySynth's controls down to just those necessary to make a familiar analog synth style interface. In terms of raw numbers, most of WhySynth's controls are present. I have, however, simplified the filter routing into just 2 options: serial and parallel, together with a mix control.
Given the list of controls, I drew up some basic outlines in QCad and started laying out the controls. I soon realized that the QCad interface was too slow for the kind of rapid layout changes and experimentation that one does at the start of a project. I'd used Inkscape before and found it to be a very capable vector graphics editor, so I gave it a try. Although apprehensive about its suitability for CAD work, progress was good once I'd learned about the various snapping modes. I wouldn't want to do serious CAD work with it, but for more visual work like designing control panels, it's quite capable. Here's a few tips for designing control panels in Inkscape:
Always clone the controls, never copy & paste or duplicate. This means that you can update the original control and all the linked clones will update too.
Setup a grid for snapping to keep things nicely aligned. It can be useful at later stages to create a finer secondary grid for more precise work. Learn how to use the other snapping modes when a simple grid isn't enough.
Inkscape's undo support will remember every edit you've made since you opened a file, so don't be afraid to try out whatever crazy ideas you might have. You can always undo them.
Put different aspects of the controls on different layers. For example, you might have a 'Cut' layer that represents where the panel will be cut out to mount controls and an 'Outline' layer to show how big the controls will be & check for interference with other controls.
Take a look at my panel design to see these ideas in practice. There are 2 fonts in the design, Galette and Waree, that you may need to display it properly.
There are plenty of guides for Blender, so I'm not going to go into details about it's use in this context. Suffice to say, it's reasonably straight forward to create models of geometrically simple things like knobs, buttons and control panels. Just remember, for realistic renders use Ambient Occlusion. If you're not using Blender's internal renderer there's probably other global illumination methods available to you.
Coming up
That pretty much covers the design of the panel itself. In the next post I'll talk about the hardware and software involved and how it all fits together.
blog comments powered by Disqus
